Please enter banners and links.
[opnsense24.1]安装指引
- 准备工具:
- Opnsense 24.1 镜像文件;
- Win32 disk image镜像文件写入工具;
- 4Gb 以上容量 U盘;
- 具体2个网口以上的迷你PC;
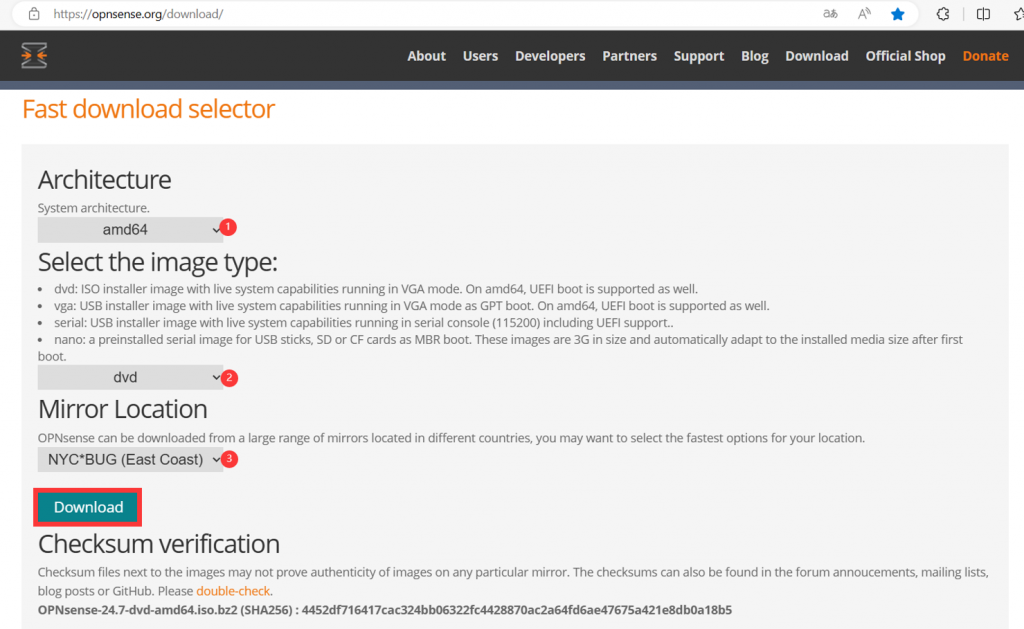
- 1.下载Opnsense 24.1 镜像文件,下载地址:https://opnsense.org/download/ore
Architecture选择amd64Select the image type选择dvd- Mirror Location保持默认即可
- 点击Download开始下载,OPNsense 镜像默认为
.bz2压缩格式,因此下载完成并校验文件信息后,需要将镜像的 ISO 文件解压出来。
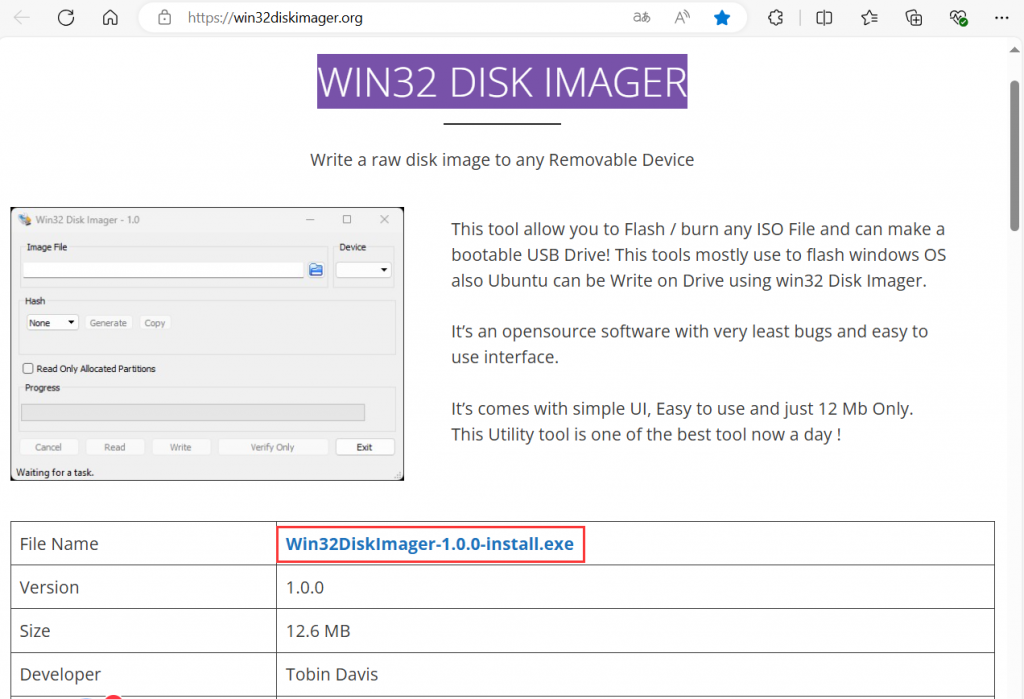
- 2.下载并安装Win32 disk image,下载地址:https://win32diskimager.org/
- 3.将U盘插入计算机,利用Win32 disk image将Opnsense 24.1 镜像文件写入到U盘中;
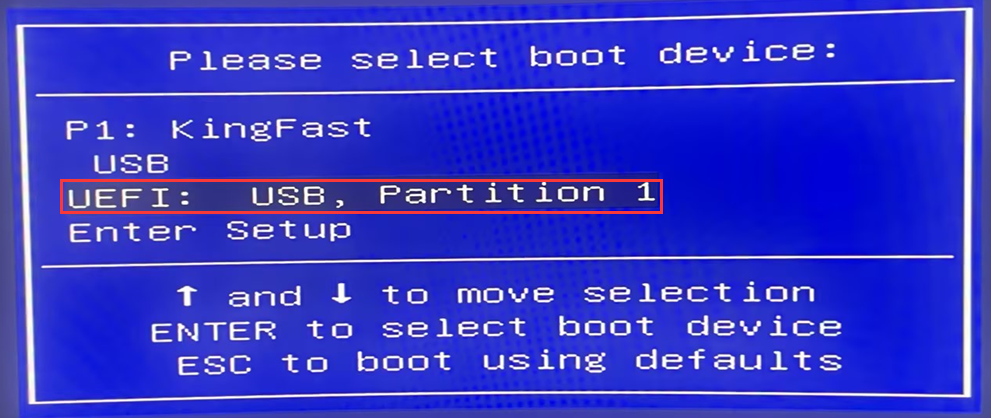
- 4.将写入成功的U盘插入需要安装系统的USB端口上,按F7或F11键进入Boot menu,选择UEFI前缀的U盘并按Enter键进入安装向导;
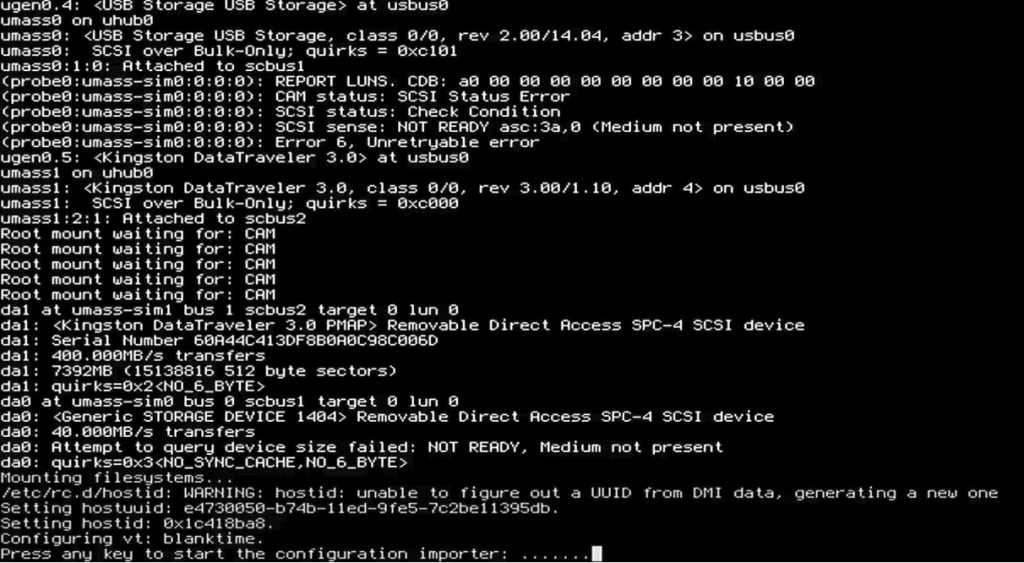
- 5.配置导入
- 进入引导跑码阶段,系统会出现提示,信息如下:
- Press any key to start the configuration importer: …
- 表示系统正在等待用户决定是否需要导入配置,一般情况下 忽略 即可。
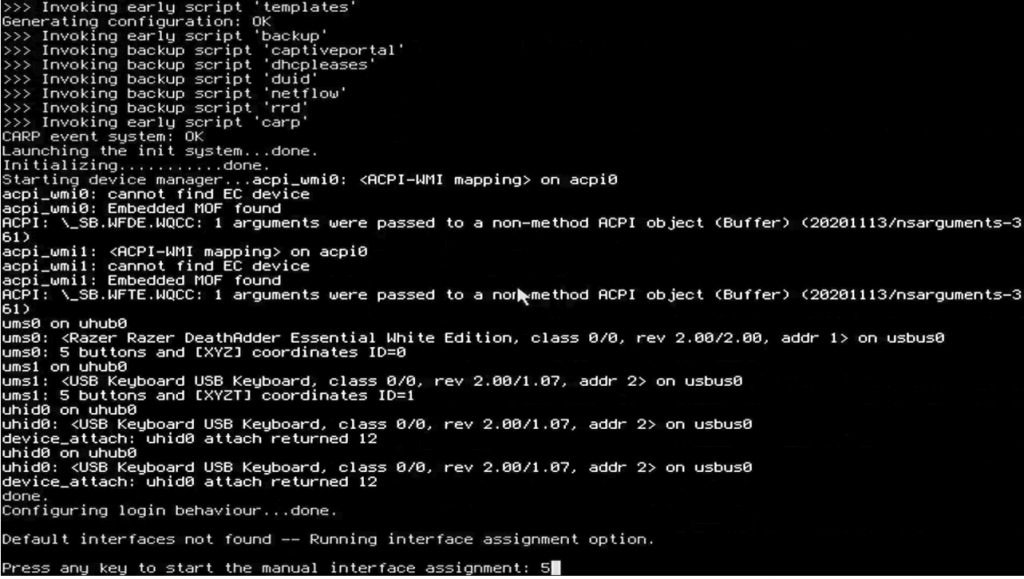
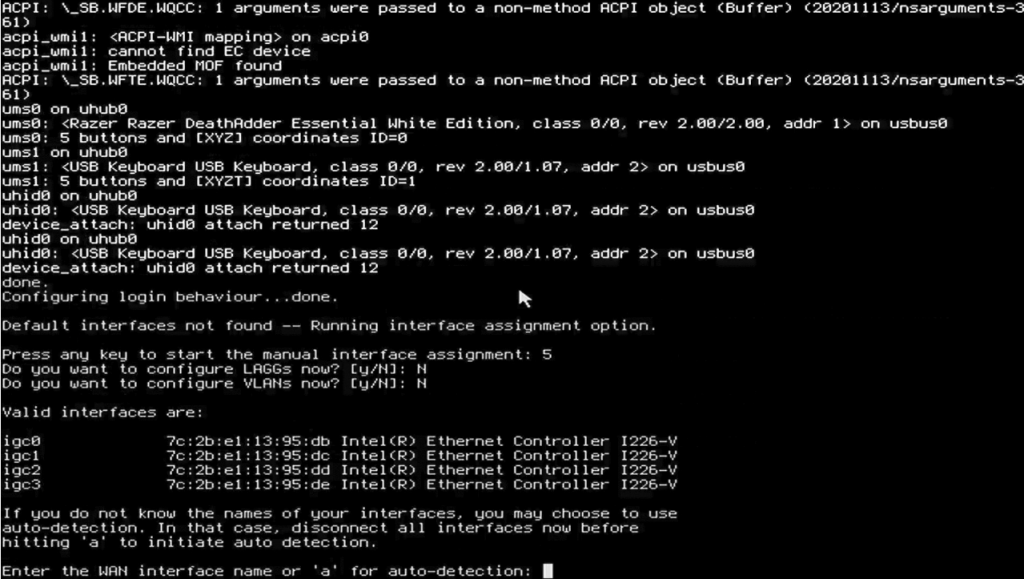
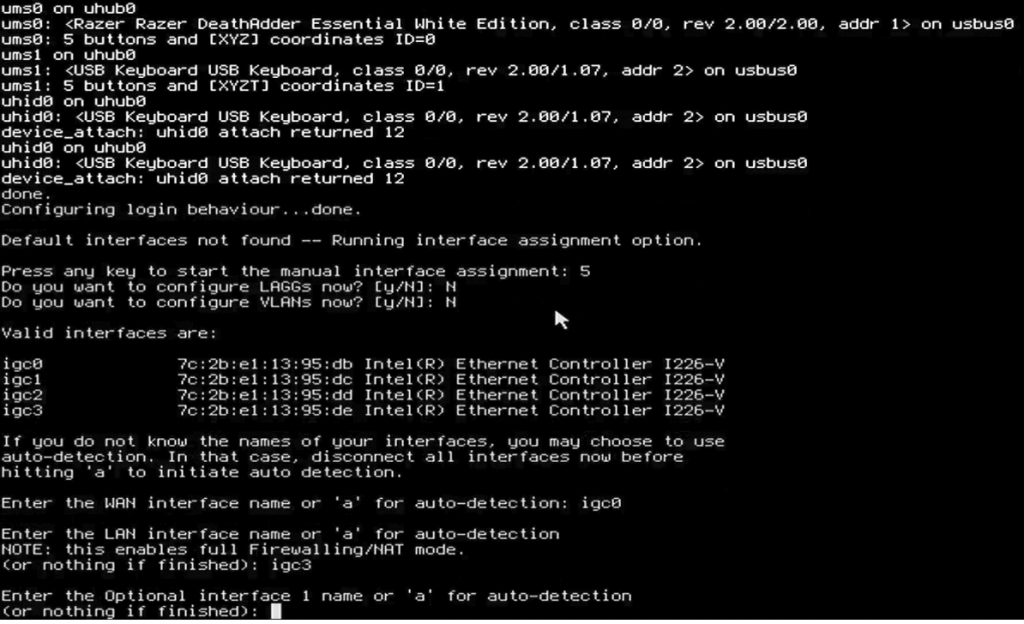
- 5.分配网口
- 系统将继续跑码,并再次出现提示,信息如下:
- Press any key to start the manual interface assignment: 5
- 表示系统正在等待用户决定是否 手动 分配网口,有
5秒倒计时。 - 此时需要在倒计时结束之前,按下键盘 任意 按键(例如
空格键或回车键)进入网口分配流程。
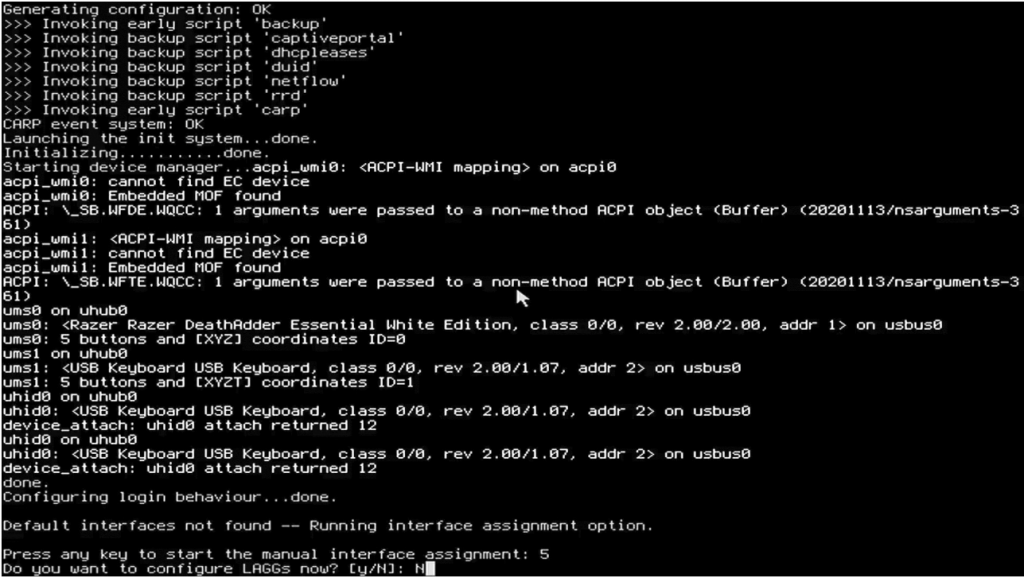
- 系统提示是否配置
LAGGs,输入N并回车: - Do you want to configure LAGGs now? [y/N]: N
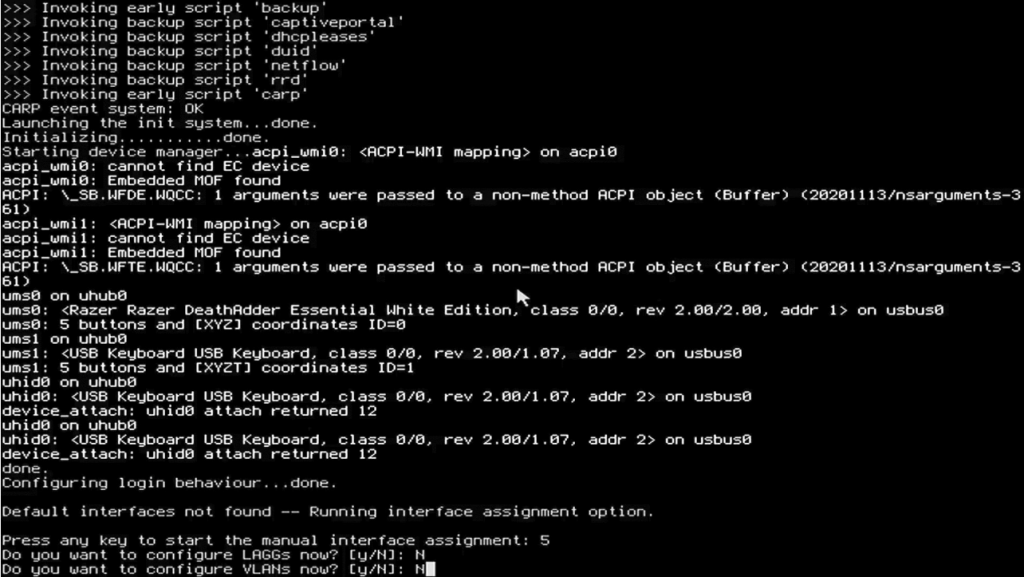
- 系统提示是否配置
VLANs,输入N并回车: - Do you want to configure VLANs now? [y/N]: N
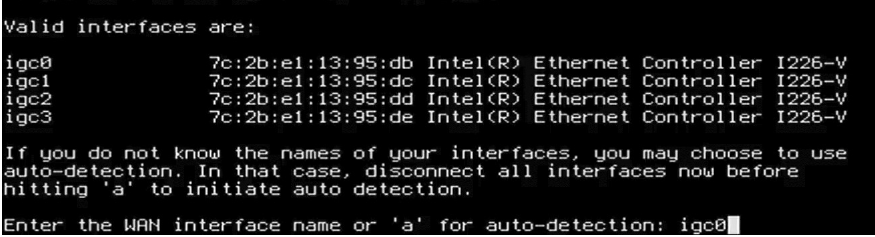
- 6.系统会显示出网口列表,并提示信息:
- 表示系统等待用户输入
WAN对应的网口名称,或输入a进行自动探测。 - 此时,需要根据
Valid interface are列表中的信息,选择WAN对应的网口。 - 注意:不同硬件类型的网卡,此处显示的网口名称会有所不同,请注意区分。建议通过主板内部RJ45网卡上的MAC贴纸对应列表中的MAC地址进行区分。

- 本文以 第一个 网口
igc0分配为WAN口进行演示:
WAN口分配完成后,系统会提示如下信息:- Enter the LAN interface name or 'a' for auto-detection
NOTE: this enables full Firewalling/NAT mode.
(or nothing if finished):
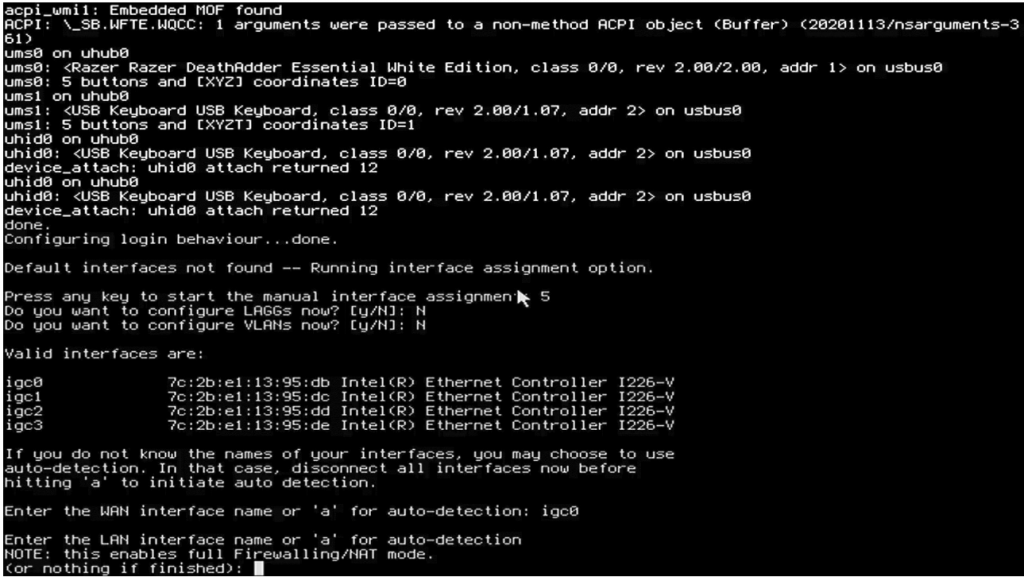
- 表示系统等待用户输入
LAN对应的网口名称,或输入a进行自动探测。 - 而且一旦分配了
LAN,OPNsense 将默认激活防火墙和NAT相关功能。 - 如果用户不想指定任何
LAN,留空即可。
- 为了后续 OPNsense 网口顺序与物理网口保持一致,请选择 最后一个 网口。
- 当前最后一个网口为
igc3,将其分配为LAN口:
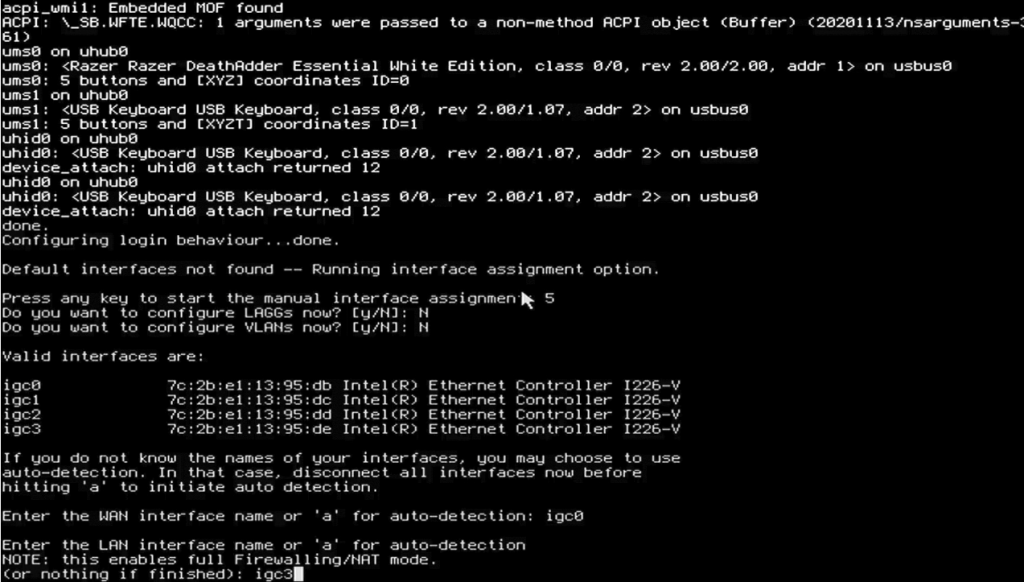
LAN口分配完成后,系统会提示如下信息:- Enter the Optional interface 1 name or 'a' for auto-detection
(or nothing if finished):
- 表示系统等待用户输入
OPT1(可选网口)对应的网口名称,或输入a进行自动探测。 - 如果用户不想指定任何
OPT1,留空即可。 - 本文后续将会创建内部网桥,因此不对其分配网口,直接按
回车键结束网口分配流程。
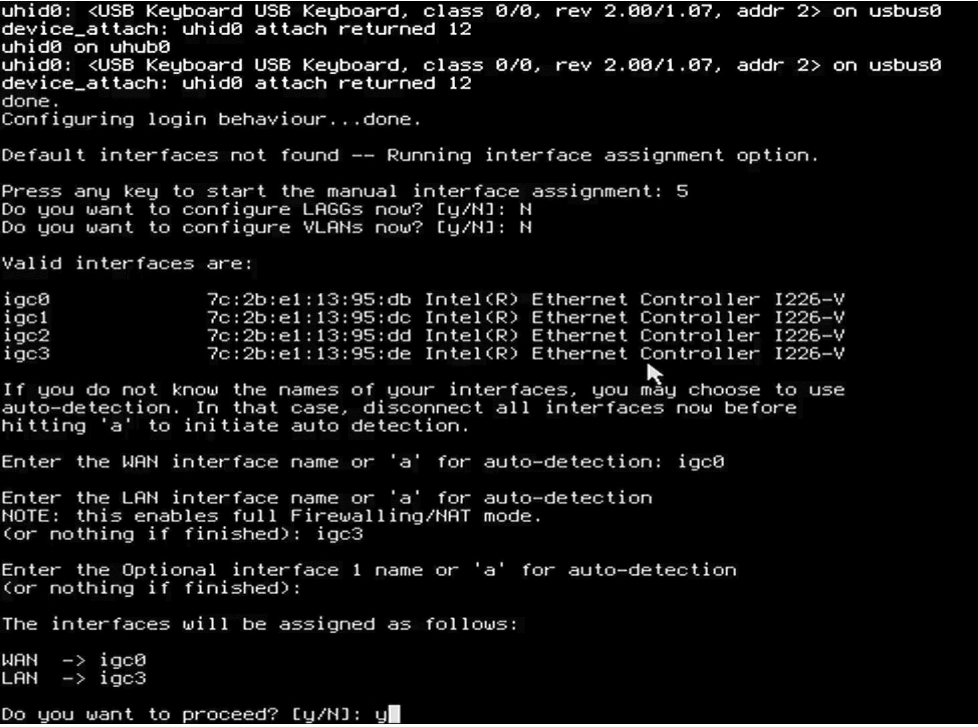
- 系统展示当前网口分配结果,并询问是否执行,输入
y并回车: - Do you want to proceed? [y/N]: y
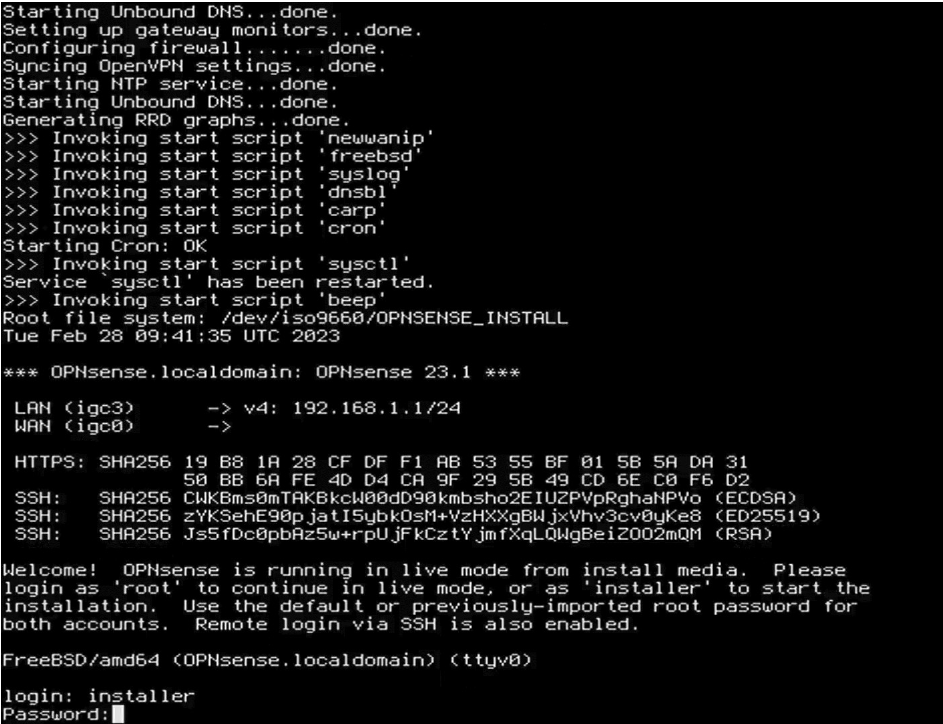
- 7.登录安装账户
- 使用账户
installer和默认密码opnsense进行登录,进入系统安装流程。 - 与 Linux 系统一样,输入密码时不会有任何提示符出现。
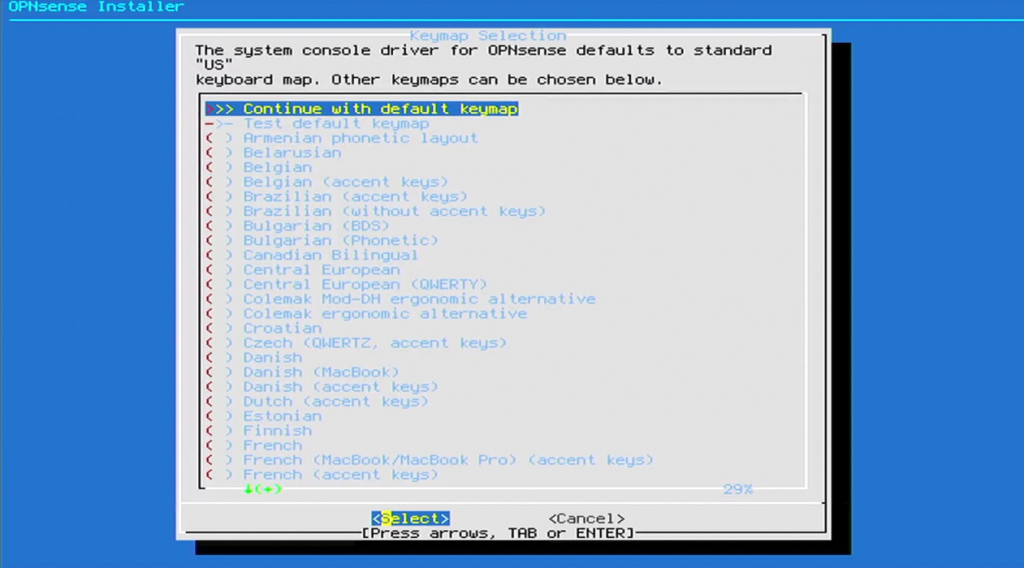
- 8.选择键盘键位
- 一般保持默认的
US键盘键位即可,按键盘回车键继续。
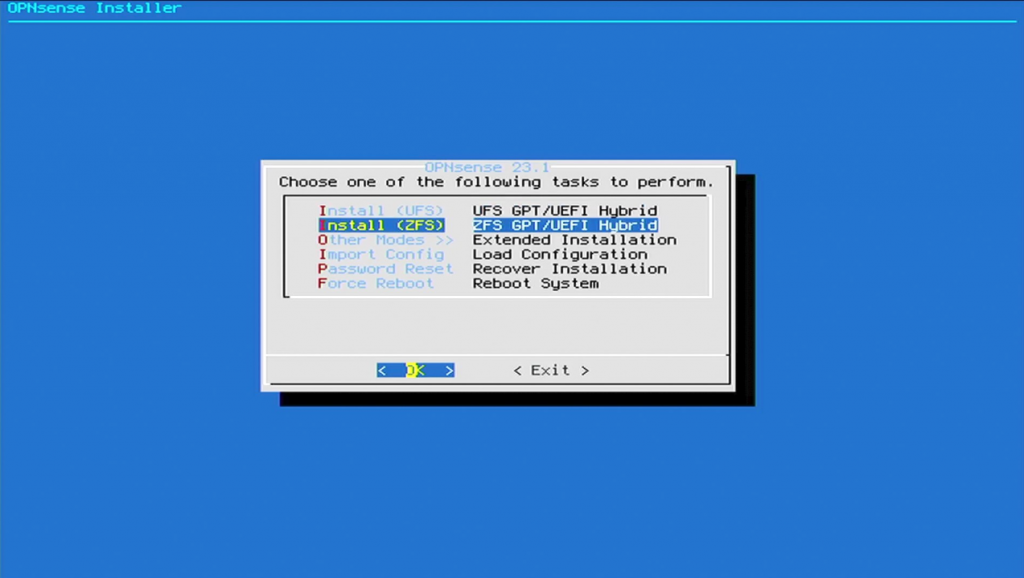
- 9.配置文件系统
- 默认情况下 OPNsense 将使用
UFS文件系统,但本文以ZFS进行演示。 - 因为 OPNsense 底层为 FreeBSD ,已对
ZFS文件系统提供良好支持。 - 按键盘
方向键选择Install (ZFS),按回车键继续。
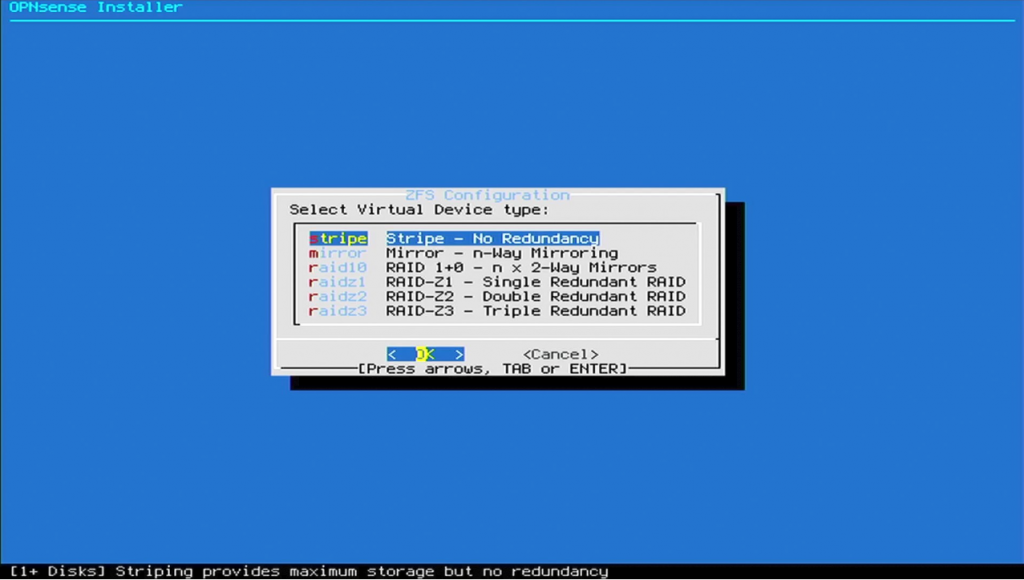
ZFS 提供了多种冗余模式,不同模式之间的区别可参考 TrueNAS 相关文档,简单来说区别如下:
stripe: single disk stripe pool
mirror: mirror pool (similar to raid-1, ≥ 2 disks, 1:1 redundancy)
raidz1 pool (similar to raid-5, ≥ 3 disks, 1 disk redundancy)
raidz2 pool (similar to raid-6, ≥ 4 disks, 2 disks redundancy)
raidz3 pool (similar to raid-7, ≥ 5 disks, 3 disks redundancy)
- 由于此时只有一块硬盘,因此选择条带模式
stripe。
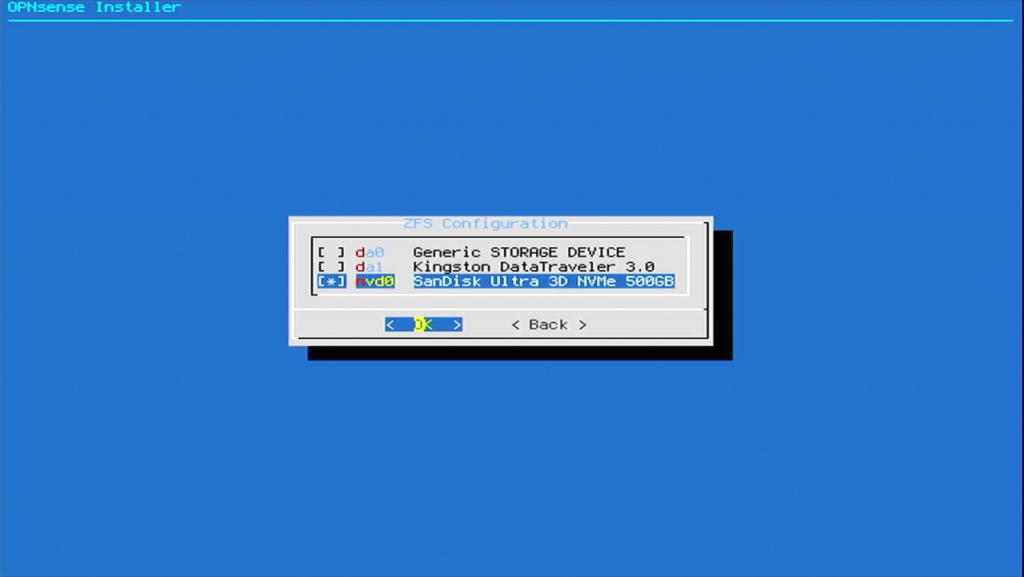
- 选择安装目标硬盘,按键盘
方向键来选择,按空格键选中,按回车键继续。 - 被选中的硬盘前面将出现
[*]标记,这里以NVMe固态硬盘进行演示。
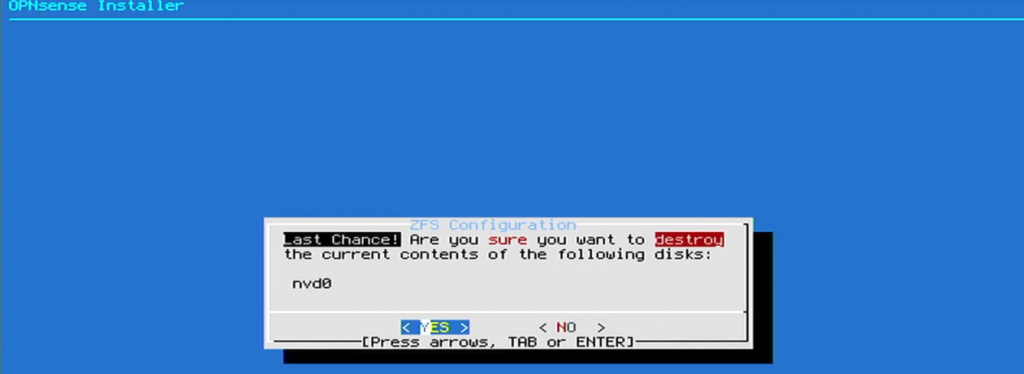
- 系统提示该操作会 格式化 硬盘,按键盘
方向键选择YES,按回车键继续。
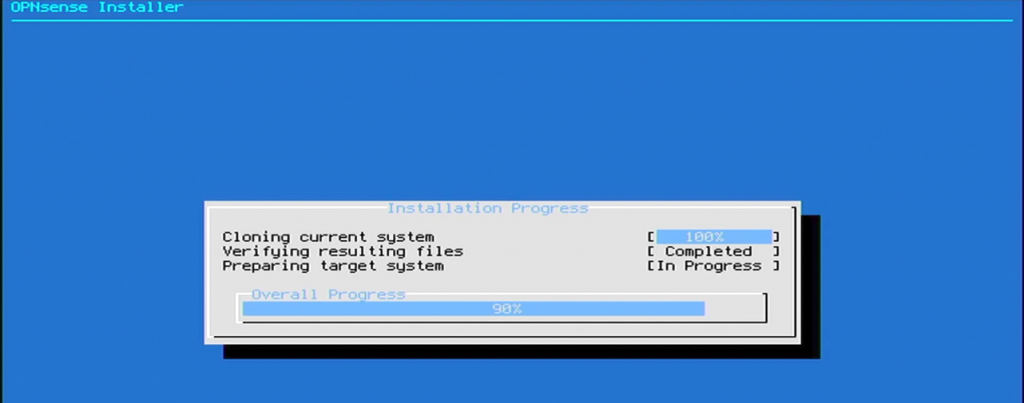
- 10.安装进度
- OPNsense 安装正式开始,可以看到当前执行步骤以及进度。
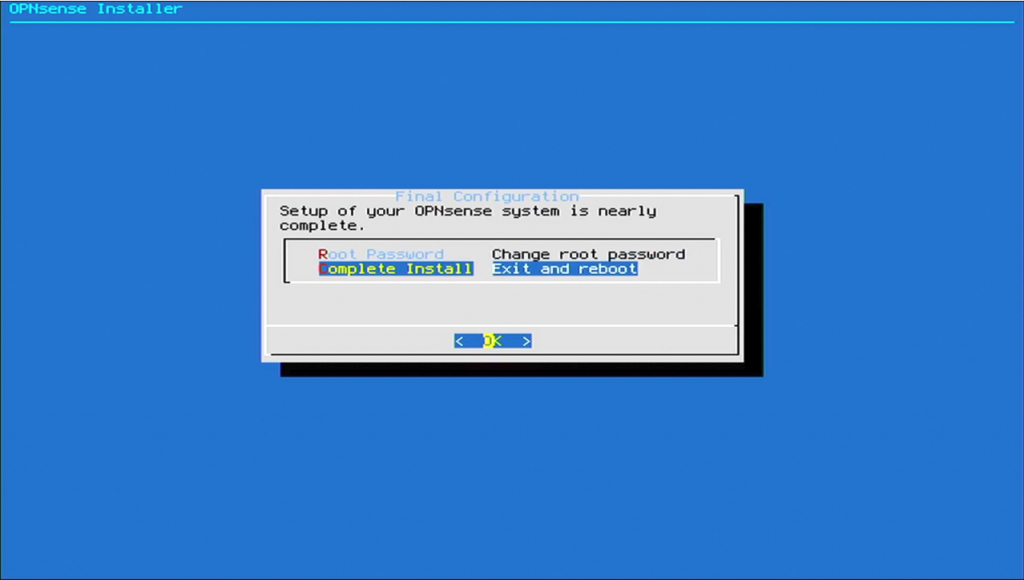
- 11.安装完成
- 按键盘
方向键选择Complete Install,按回车键继续。 - 此时系统将重新启动,对于物理机安装时,可移除引导 U 盘。